Introduction
Time blocking on your calendar is a proven productivity technique used by top-performing professionals, managers, and teams. If you’re using Microsoft Outlook as your primary calendar, blocking off time is a simple yet powerful way to protect your focus, structure your day, and prevent meeting conflicts or overbooking.
In this post, we’ll walk you through exactly how to block time in Outlook, whether you’re using the desktop app or the web version, sharing your calendar or not. You’ll also learn how to set recurring time blocks, apply color coding, and even sync those time blocks across your other calendars using CalendarBridge. If you use Google calendar instead (or in addition to Outlook), learn how to block time in Google calendar.
What Does “Blocking Time” in Outlook Mean?
Blocking time in Outlook means creating calendar events that reserve chunks of your day for specific tasks, without inviting others. These are private appointments that show you as “Busy” so others on your team calendar can’t add to your schedule over that time.
Common use cases include:
- Focus time or deep work
- Breaks or lunch hours
- Personal errands or appointments
- Admin work and email catch-up
- Planning or reflection time
Unlike a meeting or event that involves attendees, a blocked time slot is just for you, it serves as a protective barrier in your calendar. If you sync your work and personal calendars, the time will show you as not available there as well.
How to Block Off Time in Microsoft Outlook Using the Desktop App
If you’re using the Outlook desktop app, here’s how to create a time block:
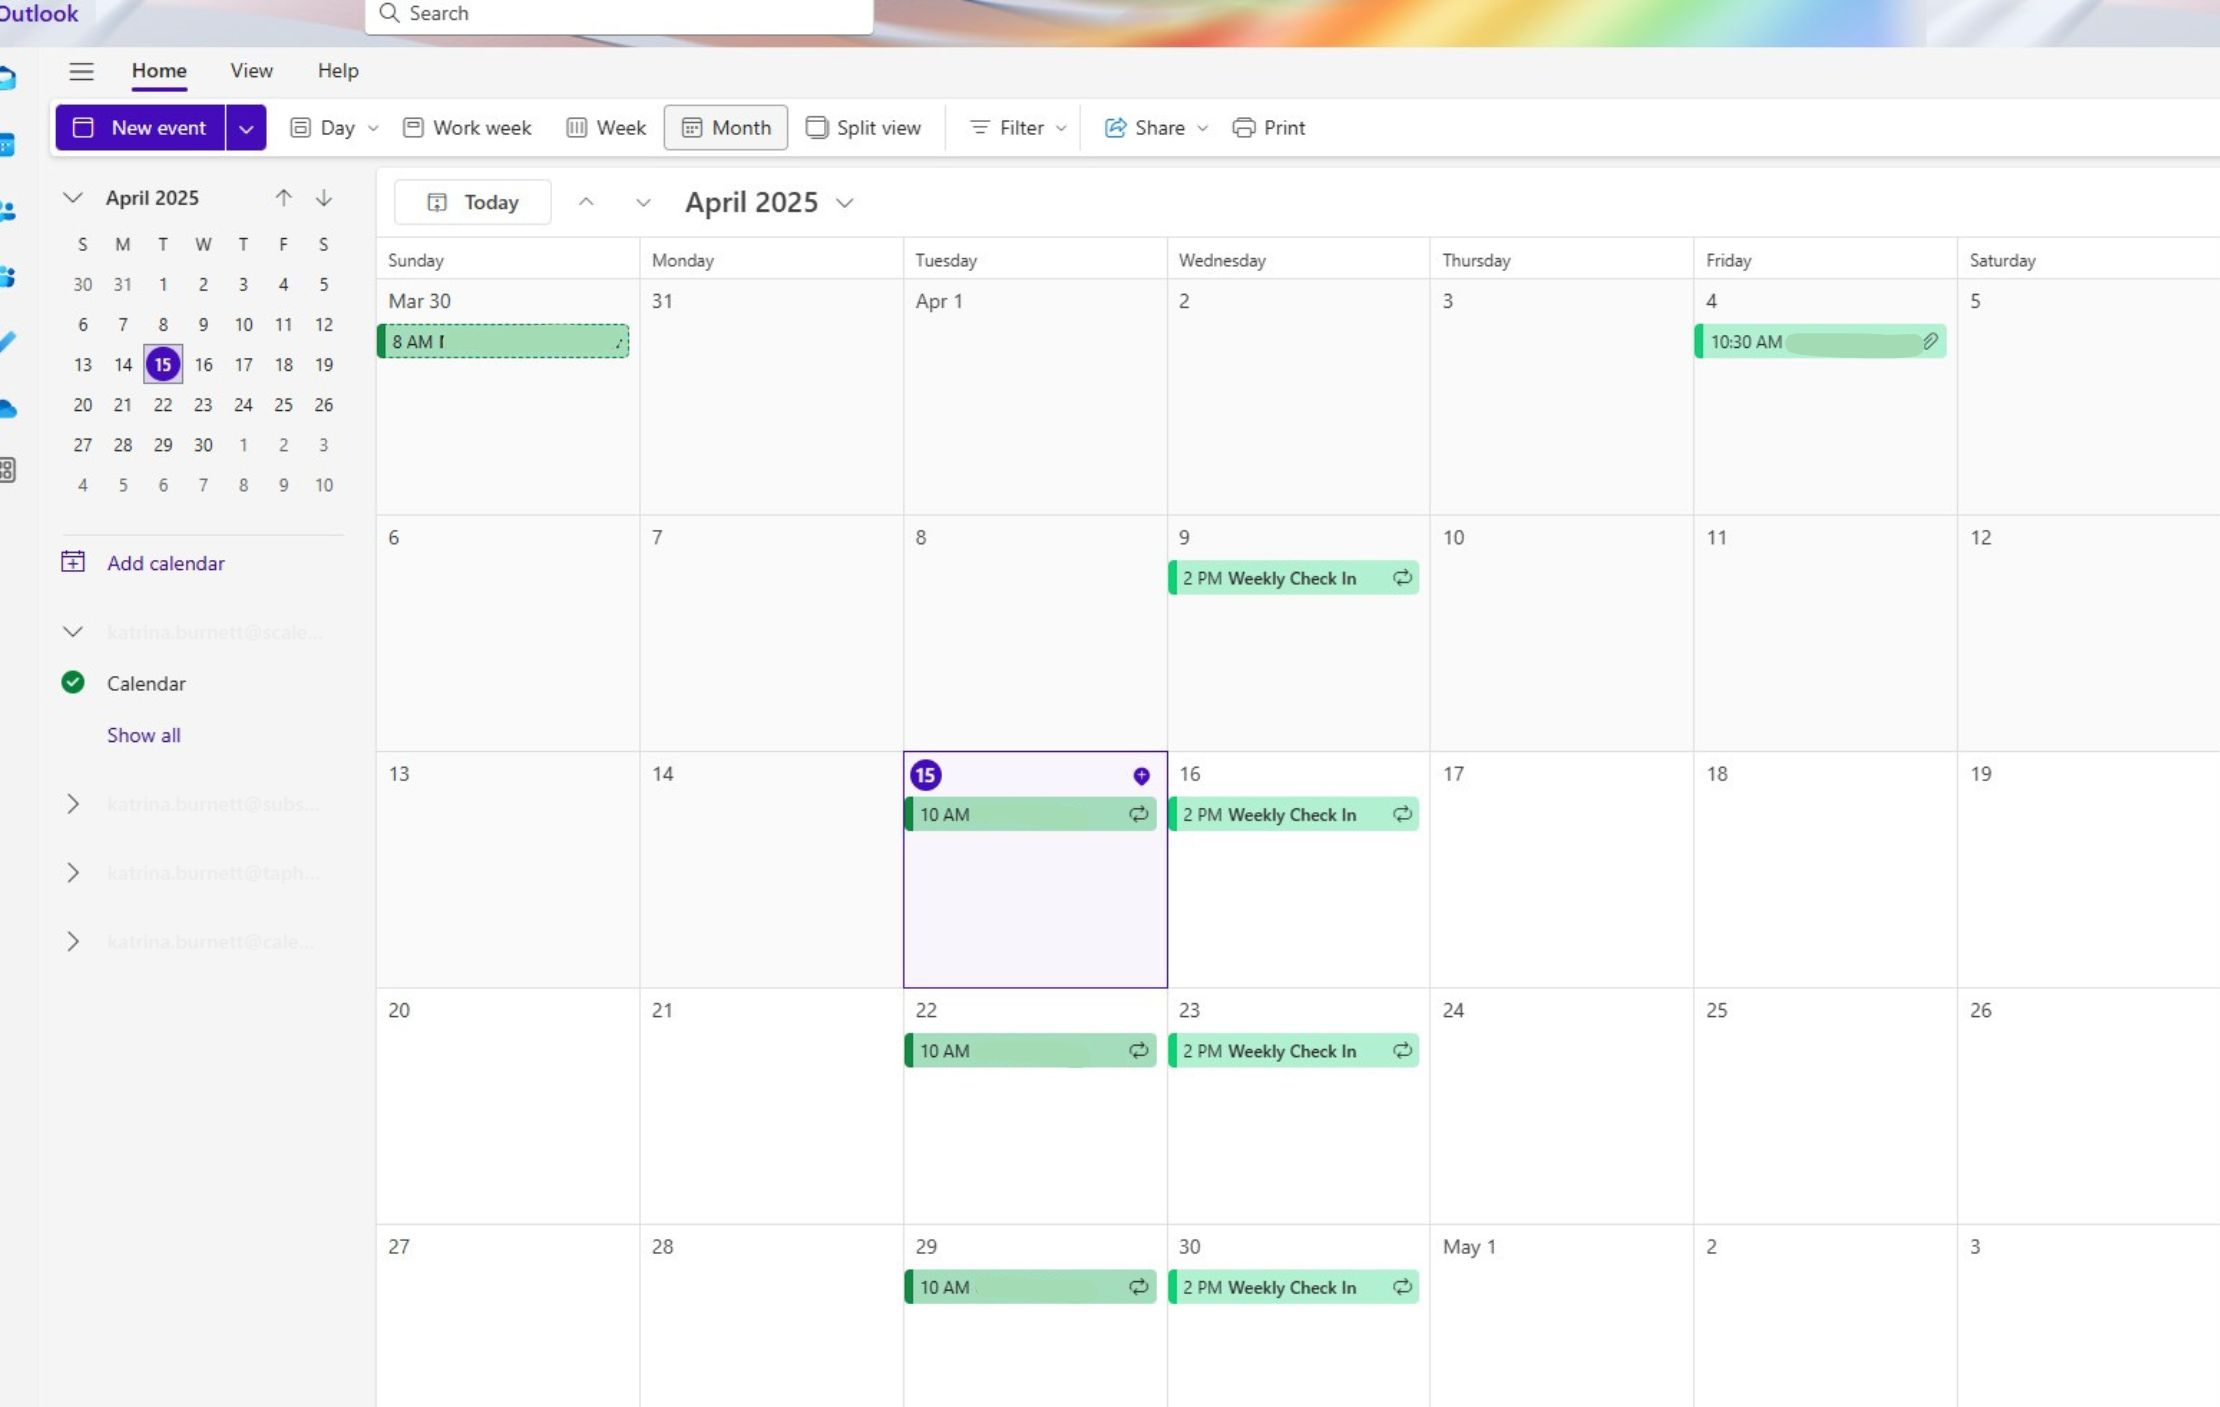


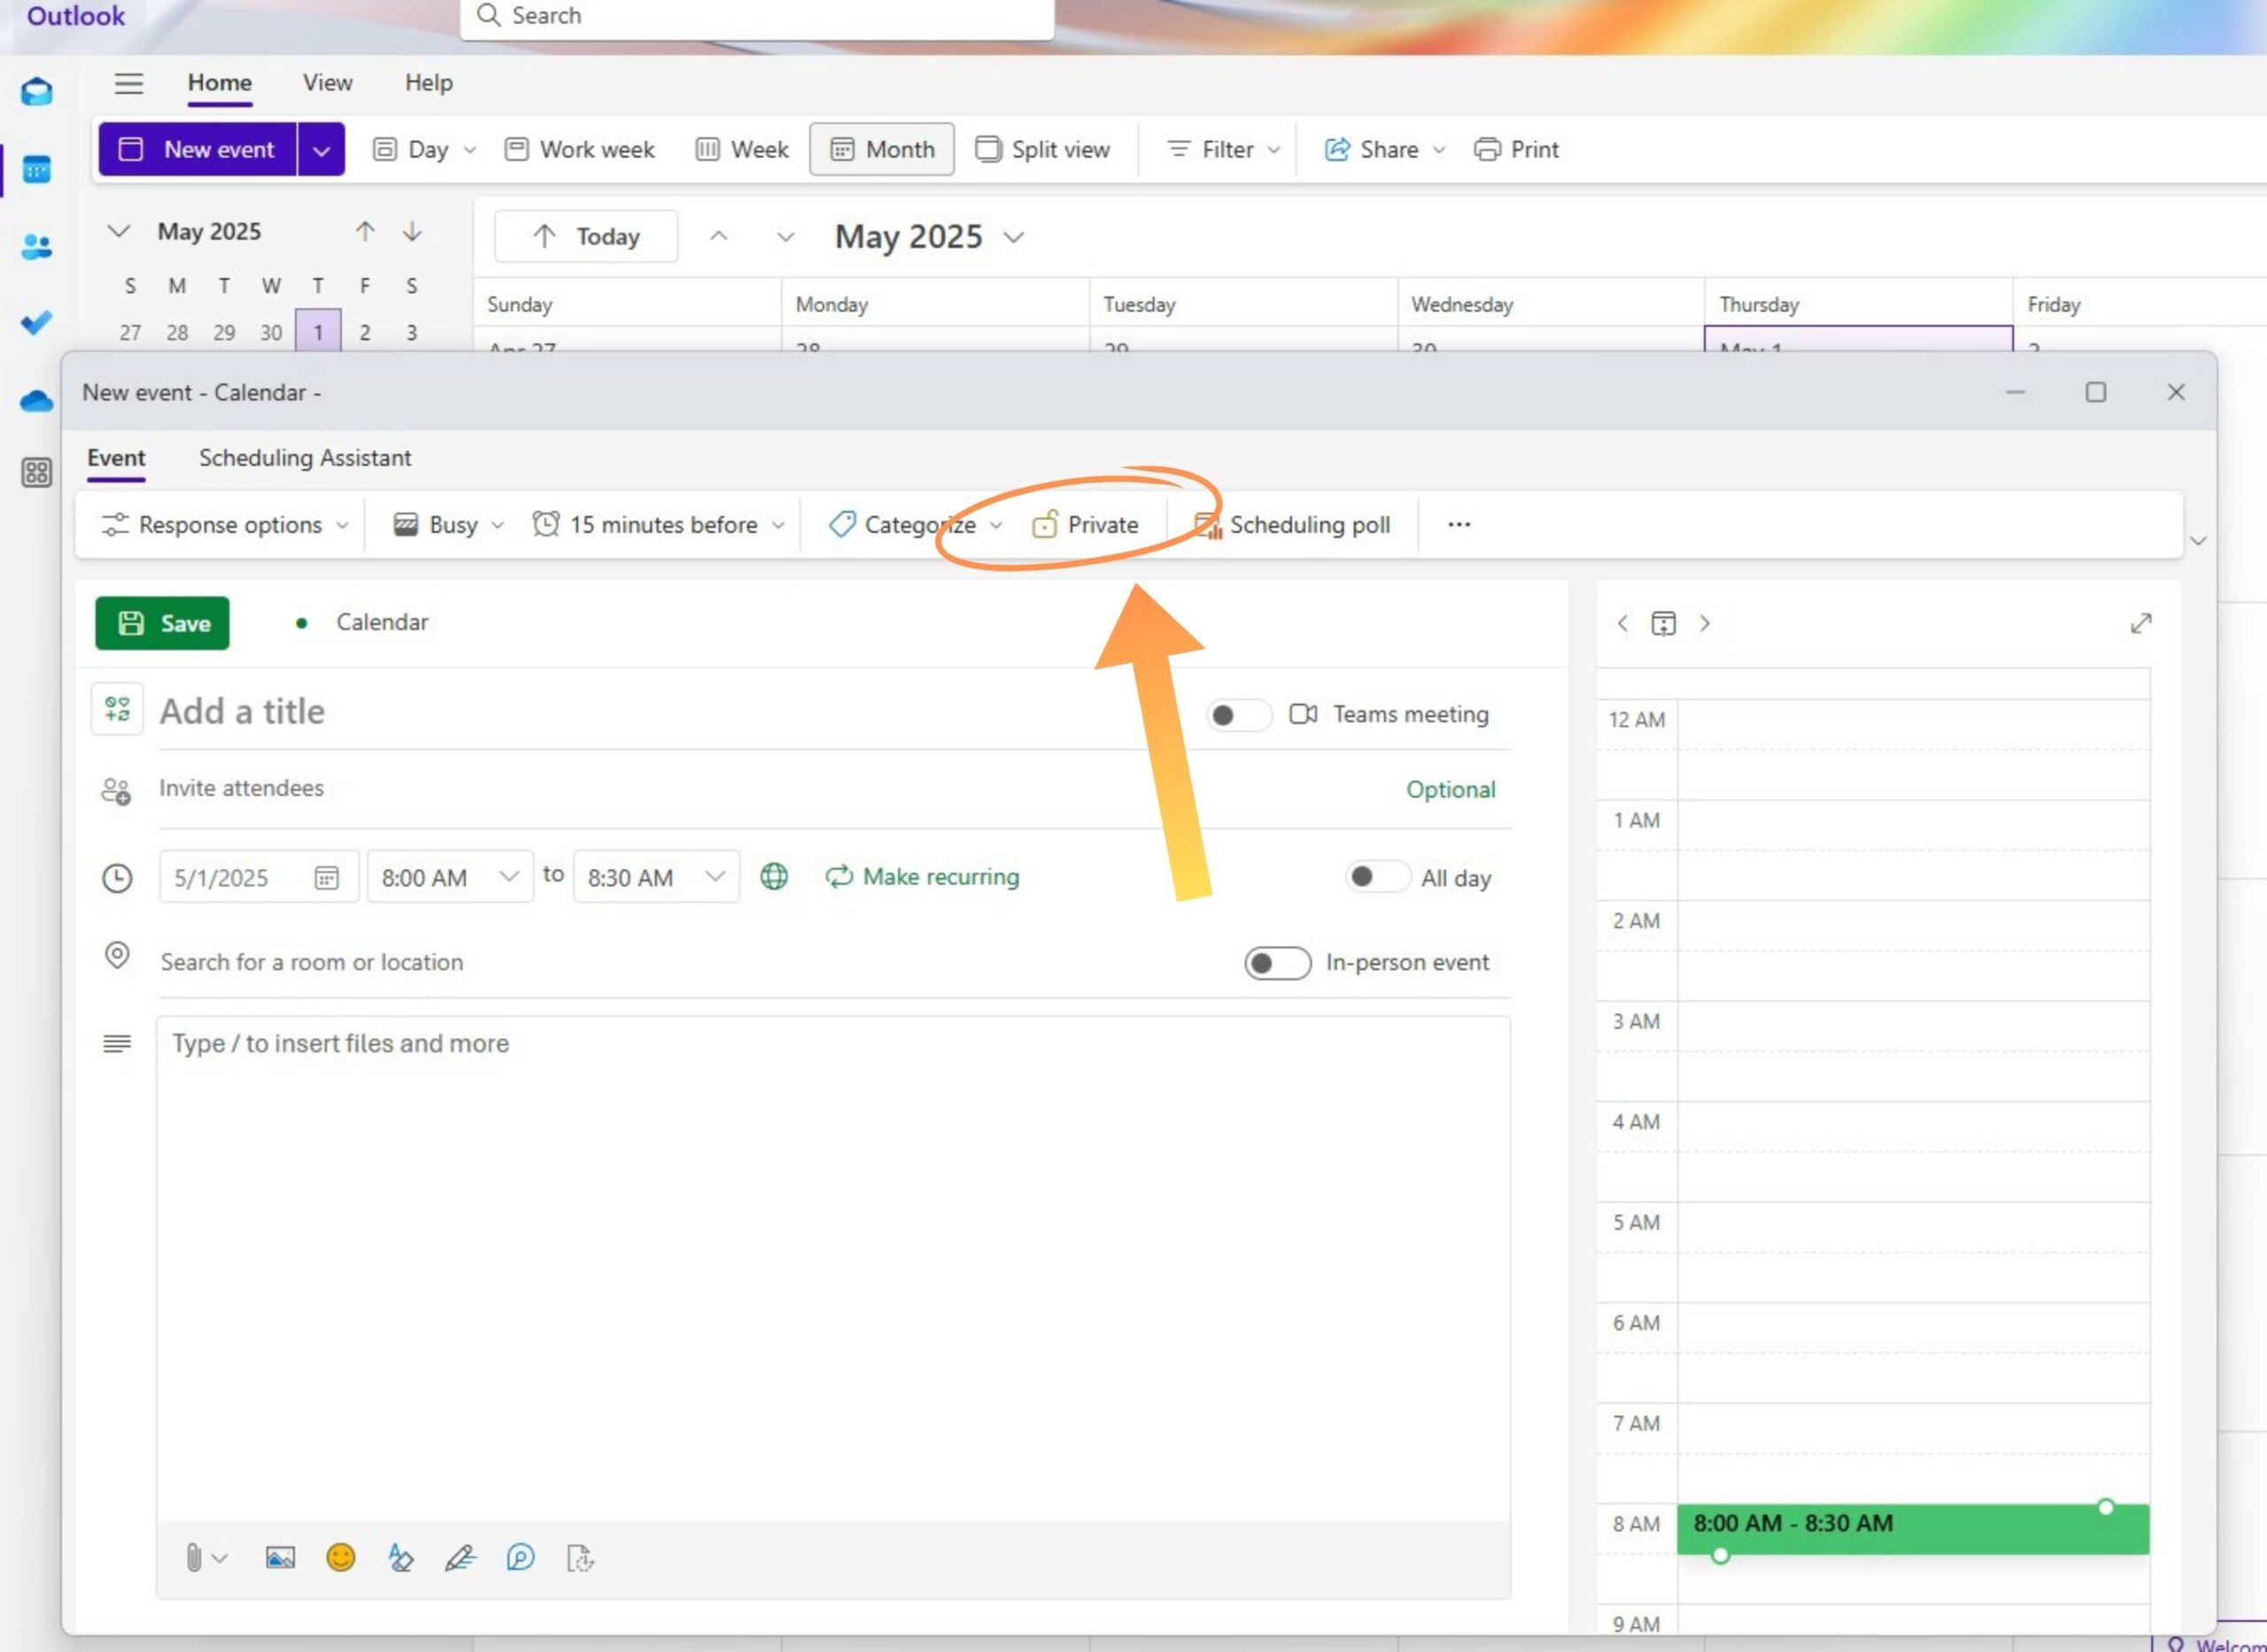
This will add a private time block to your calendar and mark that time as unavailable to others.
Blocking Time in Outlook Web (Outlook on the Web / OWA)
Using Outlook in a browser? The process is just as easy:


Blocked time will appear on your calendar just like any other event, but without involving attendees.
Setting Recurring Time Blocks (Daily, Weekly, etc.)
Want to block the same time every day or week? Outlook makes recurring appointments simple.


Use recurring blocks for routines like:
- Daily focus sessions
- Weekly admin catch-up
- Biweekly personal check-ins

Advanced Tips for Effective Time Blocking in Outlook
To get even more out of your time blocks, try these advanced strategies:
- Use Color Categories: Assign colors to different types of time blocks (e.g., blue for focus, green for personal).
- Set Reminders: Add a reminder 5–10 minutes before to prepare mentally or wrap up your previous task.
- Leverage Viva Insights (Microsoft 365 users): Use the “Focus Time” feature to automatically reserve distraction-free time.
- Consider Time Zones: Blocking time for remote teams? Set appointments using time zone-aware options.

Bonus – How to Sync Blocked Time Across Multiple Calendars
If you manage multiple calendars (work, personal, side projects), it’s easy for conflicts to creep in, unless your blocked time is visible everywhere.
That’s where CalendarBridge comes in. With CalendarBridge real-time calendar syncing, both you and coworkers across all your organizations can see your accurate, synchronized availability, directly in Outlook, Google Calendar, and iCloud.
This means when you block time in one calendar, it appears as “Busy” on the others, helping you avoid double-booking and maintain boundaries.
Make Time Blocking Work, Keep All Your Calendars in Sync with CalendarBridge

Frequently Asked Questions
Not directly. Outlook doesn’t sync availability across accounts in real time. You’ll need a tool like CalendarBridge to sync multiple calendars and avoid double bookings.
When creating your event, click “More Options” and check the box labeled “Private.” This hides event details while still showing you as “Busy” to others.
Outlook accounts operate independently. Even when you share calendars, updates can be delayed and privacy settings aren’t always consistent. That’s why cross-platform tools like CalendarBridge exist.
That’s normal. Time blocking is meant to give you structure, but it shouldn’t be rigid. Adjust your blocks as your day shifts, and leave buffer time to stay flexible.
Create separate events for admin work, calls, prep time, and even breaks. Label them clearly and use colors or categories to visually separate your work.
Final Thoughts
Time blocking in Outlook Calendar is one of the simplest ways to take back control of your day. When every task and meeting has a place, your brain doesn’t have to juggle it all. But if you’re juggling multiple calendars across work and personal accounts, that structure quickly breaks down. That’s where tools like CalendarBridge come in, helping you maintain accurate availability, stay organized, and adapt to the realities of a busy schedule. Whether you’re trying to get more focused time or just survive meeting overload, time blocking can be a game-changer when done right.