
Introduction
Adding your scheduling link to your LinkedIn profile is one of the easiest ways to turn profile views into actual meetings.
For me, as a marketing consultant, I actually love when someone books through my LinkedIn, because I know they didn’t just randomly grab a time. They looked at my profile. They saw my content. They saw who I’ve worked with. They got a feel for how I think.
Then they see the link and it’s like, well… I might as well book a meeting. That context matters. It makes the meeting better before it even starts.
This guide walks through exactly how to add your CalendarBridge scheduling link to LinkedIn and where it performs best.
Step 1: Login and Copy Your CalendarBridge Scheduling Link
Start by grabbing your scheduling link from CalendarBridge.
- Log into your CalendarBridge account
- On the dashboard, click “Schedulers” in the left menu
- Copy your personal booking URL
This is the link people will use to book time with you.

Step 2: Add Your Scheduling Link to Your LinkedIn Profile
There are two ways to add your scheduling link to LinkedIn, depending on whether you have a Premium account.
Option 1: Add a “Book an Appointment” Button (LinkedIn Premium)
If you have LinkedIn Premium, you can add your scheduling link directly to your profile as a button.
- Go to your LinkedIn profile
- Click Edit profile
- Scroll to your contact or profile settings
- Paste your CalendarBridge scheduling link
- Save
Once added, LinkedIn will display a “Book an appointment” button right on your profile.
This is the most visible placement and gives people a clear, immediate way to schedule time with you.

Option 2: Add Your Link to the Featured Section (Free and Premium)
If you don’t have LinkedIn Premium, this is the best alternative.
- Go to your LinkedIn profile
- Click Add profile section
- Select Featured
- Click Add a link
- Paste your CalendarBridge scheduling link
- Add a title like:
- “Book time with me”
- “Schedule a meeting”
- Save
This places your link near the top of your profile, making it easy for visitors to find.

Why Add a Scheduling Link to LinkedIn?
LinkedIn is built for connections, but not for coordination. When someone wants to meet, it usually turns into a long thread just to find a time that works for both of you. And if your link isn’t there, there’s a good chance that request is sitting in your LinkedIn inbox, which, let’s be honest, most of us are not checking as often as our email.
A scheduling link removes that friction entirely. It also cuts down on the admin work that quietly eats up your time. The back and forth. Checking multiple calendars. Sending the invite. Resending the invite because you put in 10pm instead of 10am.
That’s where a scheduling link changes everything. The meeting gets booked correctly without the extra steps, the extra messages, or the extra stress.
Where Your Link Performs Best
- If you have LinkedIn Premium, the “Book an appointment” button is the most direct option, but it can be easy to overlook.
- The Featured section often stands out more, especially with a strong title and thumbnail.
- Direct messages drive the most conversions.
The best approach is to use both the button and the Featured section, then share it in messages so it’s always easy to book.
Why I Use CalendarBridge for This
There are plenty of tools that give you a scheduling link. Gmail, Calendly, and others all do it. But here’s the difference.
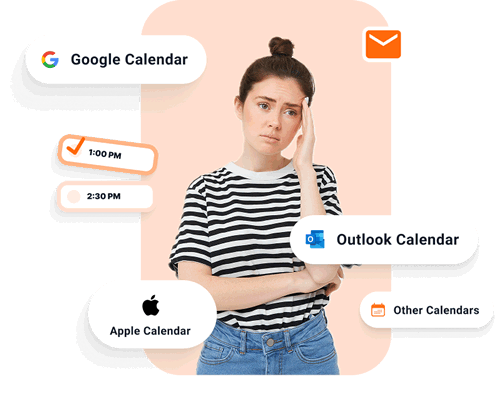
With CalendarBridge, your scheduling link reflects availability across all your calendars, not just one.
And I don’t mean just multiple calendars inside Google. I mean your work Outlook calendar, your personal Gmail, and the Apple calendar on your phone that somehow still ends up holding random things like a dog grooming appointment.
Work, personal, social, everything.
CalendarBridge checks all of it in real time, through our Calendar Sync feature. So you’re not double booking yourself or manually cross checking three different places before confirming a meeting.
It sounds small, but it’s the difference between catching conflicts early and having to choose between two things that both matter.
Tired of Getting Double-booked Because Calendars Don't Align? Try CalendarBridge Instead
No credit card required
Frequently Asked Questions
A scheduling link is a personalized URL that lets someone book time with you based on your real availability across all your calendars. Instead of emailing back and forth, they simply click the link, choose a time, and the meeting is scheduled automatically.
You can add my scheduling link by editing my profile and either using the “Book an appointment” button or adding it to the Featured section.
Yes, you can use the Featured section to add my CalendarBridge scheduling link, which is visible near the top of my profile.
The best places are the “Book an appointment” button for Premium users and the Featured section for all users. You can also share it in direct messages for higher conversion.
Adding a scheduling link removes back-and-forth messaging and makes it easy for people to book time instantly when they visit my profile.
Final Thoughts
Adding your scheduling link to LinkedIn is a simple change that makes it much easier for people to actually book time with you.
It turns profile views and conversations into real meetings without the usual back and forth, and gives people a clear next step when they’re ready to connect.
If you want that process to stay accurate across all the calendars you use, CalendarBridge handles it quietly in the background so you don’t have to think about it.